Wenn Sie eine lockige Frisur haben und sich in Ihrem täglichen Leben gut darum kümmern möchten, Sie können versuchen, Haardiffusor zu verwenden, Das wird eine Geheimwaffe für die Gestaltung Ihrer Frisur sein.
In diesem Artikel, Sie werden alles entdecken, was Sie über den Haardiffusor wissen müssen - aus der Wissenschaft dahinter und für wen sie am besten sind, zu ihren Vorteilen, richtige Verwendung, Wartungstipps, und was zu vermeiden ist. So gespannt darauf, das zu teilen, was als nächstes kommt - lassen Sie sich direkt hineinspringen!
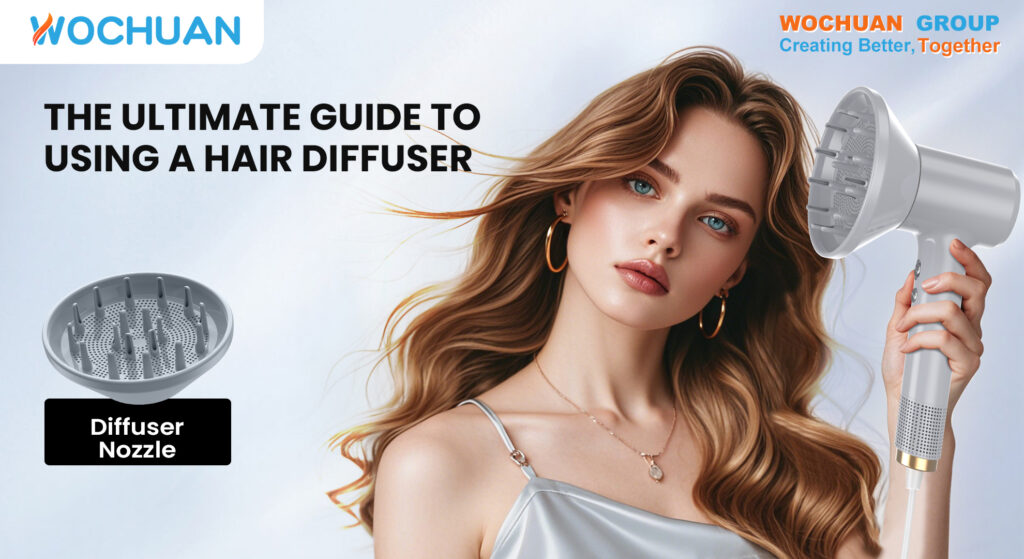
Was ist ein Haardiffusor? Die Wissenschaft dahinter
Traditionelle Haartrockner verursachen oft Frizz und Trockenheit, indem sie starke Hitze direkt auf das Haar blasen. Ein Diffusor ist ein Befestigung für einen Haartrockner, der dazu beiträgt, Wärme gleichmäßig und sanft zu verteilen. Es hat eine breite, Schalenartige Form mit Zinken, die dazu beitragen, Ihr Haar zu heben und zu trennen, einen natürlicheren Trocknungsprozess ermöglichen. Dies ist besonders vorteilhaft für lockige und wellige Haartypen, Da es hilft, das natürliche Lockenmuster des Haares aufrechtzuerhalten und gleich.
Warum funktioniert es
Verhindert direkte Wärmeschäden
Behält Feuchtigkeit und Textur bei
Reduziert Frizz und fördert das Volumen
Ideal für Locken und empfindliche Haartypen
Wer ist ein Haardiffusor, der für geeignet ist??
Ein Diffusor ist für alle Haartypen geeignet - mit der richtigen Methode:
1. Lockig & Wellige Haare (3A - 4c)
Perfekt für definierte Locken! Der Diffusor verbessert die Lockenform, reduziert Frizz, und hilft bei der Aufrechterhaltung der Struktur nach dem Waschen des Haares.
2. Feines oder dünnes Haar
Verwenden Sie eine kleine, entlüften Diffusor, um die Wurzeln sanft zu heben und ein natürliches zu schaffen, luftiges Volumen - keine mehr flachen Haartage!
3. Chemisch behandeltes Haar
Wenn Ihr Haar gefärbt wurde, PERMED, oder gebleicht, Diffuse mit niedriger Hitze hilft, zerbrechliche Stränge und Schlösser in der Flüssigkeitszufuhr zu schützen.
4、 Gerade Haare
Ob Sie es glauben oder nicht, Ein Diffusor kann auch auf geradem Haar verwendet werden, um Volumen und Textur zu injizieren.
Vorteile der Verwendung eines Haardiffusors
Weniger Wärmeschäden - Luftstrom ist sanfter und gleichmäßig verteilt
Stärkere Curl -Definition - verbessert Ihr natürliches Curl -Muster
Reduzierte Frizz - Feuchtigkeitsschlösser bei gleichzeitiger Verhinderung von Static
Steigerung des Volumens - Fügt Absprung aus den Wurzeln ohne Steifheit hinzu
So verwenden Sie einen Diffusor: Schritt-für-Schritt-Tutorial
Schritt 1: Beginnen Sie mit sauber, Feuchtes Haar
Beginnen Sie mit frisch gewaschenem Haar. Verwenden Sie ein sulfatfreies Shampoo und einen feuchtigkeitsspendenden Conditioner, um Ihre Locken hydratisiert zu halten. Nach dem Waschen, Vorsichtig Handtuchtrocknen Ihr Haar, um überschüssiges Wasser zu entfernen, Aber vermeiden Sie es, Ihre Haare kräftig zu reiben, Da kann dies Frizz verursachen.
Schritt 2: Wenden Sie ein Curl-verstärkender Produkt an
Vor der Verwendung des Diffusors, Wenden Sie ein Curl-verstärkter Produkt wie eine Mousse an, Creme, oder Gel. Dies wird dazu beitragen, Ihre Locken zu definieren und den Halt zu ermöglichen. Verteilen Sie das Produkt gleichmäßig über Ihr feuchtes Haar, Verwenden Sie Ihre Finger oder einen breiten Kamm.
Schritt 3: Befestigen Sie den Diffusor
Sobald Ihr Produkt angewendet wird, Befestigen Sie den Diffusor an Ihrem Haartrockner. Stellen Sie sicher, dass es sicher vorhanden ist, um Unfälle beim Styling zu vermeiden.
Schritt 4: Schnitte deine Haare
Sogar trocknen zu sorgen, Teilen Sie Ihre Haare in Abschnitte ein. Sie können Clips verwenden, um die oberen und unteren Schichten zu trennen. Dies erleichtert es, mit Ihrem Haar zu arbeiten und sicherzustellen, dass alle Abschnitte ordnungsgemäß getrocknet werden.
Schritt 5: Diffundieren Sie diffundieren
Stellen Sie den Trockner auf niedrige Hitze ein: Hohe Hitze kann Schäden und Frizz verursachen, Daher ist es am besten, eine niedrige oder mittlere Wärmeeinstellung zu verwenden.
Positionieren Sie den Diffusor: Platzieren Sie den Diffusor unter einen Abschnitt Ihres Haares, Vorsichtig zurückbrennen. Vermeiden Sie es, sich an Ihren Haaren zu ziehen; stattdessen, Lassen Sie es im Diffusor ruhen.
Verwenden Sie eine Rissbewegung: Wie du trocknen, Scrunchieren Sie Ihre Haare sanft nach oben in Richtung Ihrer Kopfhaut. Dies wird dazu beitragen, Ihre natürlichen Locken und Wellen zu verbessern.
Bewegen: Bewegen Sie den Diffusor weiterhin um Ihren Kopf, Arbeiten Sie jeden Abschnitt durch. Verbringen Sie zusätzliche Zeit für Bereiche, die mehr Definition benötigen.
Schritt 6: Mit kühlem Luft abschließen
Sobald Ihr Haar meistens trocken ist, Wechseln Sie zur kühlen Einstellung Ihres Faartrockners. Dies hilft dabei, Ihre Locken festzulegen und Frizz zu reduzieren. Drücken Sie Ihre Haare weiter, während Sie die kühle Luft auftragen.
Schritt 7: Lass deine Haare abkühlen
Nach der Verbreitung, Lassen Sie Ihre Haare ein paar Minuten abkühlen. Dies wird dazu beitragen, Ihren Stil einzuschließen und Ihren Locken mehr Definition zu geben.
Schritt 8: Flusen und getrennt
Sobald Ihr Haar kühl ist, Trennen Sie Ihre Locken sanft mit den Fingern, um Volumen hinzuzufügen. Vermeiden Sie die Verwendung eines Pinsels, Da kann dies Ihr Lockenmuster stören und Frizz erzeugen.
Schritt 9: Beenden Sie mit einem leichten Hold -Spray
Um Ihre Locken an Ort und Stelle zu halten, Beenden Sie mit einem leichten Haarspray oder einem Lockenspray-Spray. Dies wird dazu beitragen, Ihren Stil den ganzen Tag über aufrechtzuerhalten.
Top -Spitzen für die Verwendung eines Diffusors auf lockigem Haar
- Nur trocken bis 90% Trocknen - etwas Feuchtigkeit für Weichheit lassen
- Heben Sie die Wurzeln mit Ihren Händen oder Clips, während Sie diffundieren
- Halten Sie den Diffusor immer noch, um zu vermeiden, dass die Lockenform stört
- Fügen Sie ein paar Tropfen Öl hinzu
Top -Spitzen für die Verwendung eines Diffusors auf geradem Haar
- Verwenden Sie Clips an den Wurzeln: Clip -Abschnitte von Haaren an den Wurzeln, bevor Sie den Diffusor verwenden, um Knicke zum Formular zu ermutigen, mehr Volumen erzeugen.
- Tippen Sie Ihren Kopf auf den Kopf, während Sie diffundieren: Trocknen Sie Ihr Haar verkehrt herum, um den Sprung an Ihren Wurzeln zu maximieren.
- Verwenden Sie Produkte zum Volumising Style: Wenden Sie Produkte, die speziell entwickelt wurden, um Volumen hinzuzufügen, wie Mousses oder Gele.
Häufige Fehler zu vermeiden
- Überdiffuses: Zu lange an einer Stelle zu bleiben kann Haare austrocknen
- Zu viel Produkt: Überschichtend verursacht Anbau und schlaffe Locken
- Hohe Hitze: Wählen Sie immer niedrige Hitze + Cooler Schuss für gesunde Ergebnisse
So reinigen Sie Ihren Haardiffusor
Trenne den Diffusor und tränke ihn in warm, Seifenwasser für 10–15 Minuten. Verwenden Sie eine weiche Bürste, um die Lüftungsschlitze zu reinigen, gründlich ausspülen, und lass es lufttrocknen lassen. Reinigen Sie regelmäßig, um den Luftstrom- und Styling -Leistung aufrechtzuerhalten.
Abschluss
Ein Diffusor ist nicht nur ein Styling-Tool-es ist ein Spielveränderer für alle, die definierte Locken haben wollen, Reduzierte Frizz, und dauerhaftes Volumen. Beherrschen Sie diese Techniken und verwandeln Sie jedes Föhnen in ein Selbstpflege-Ritual.
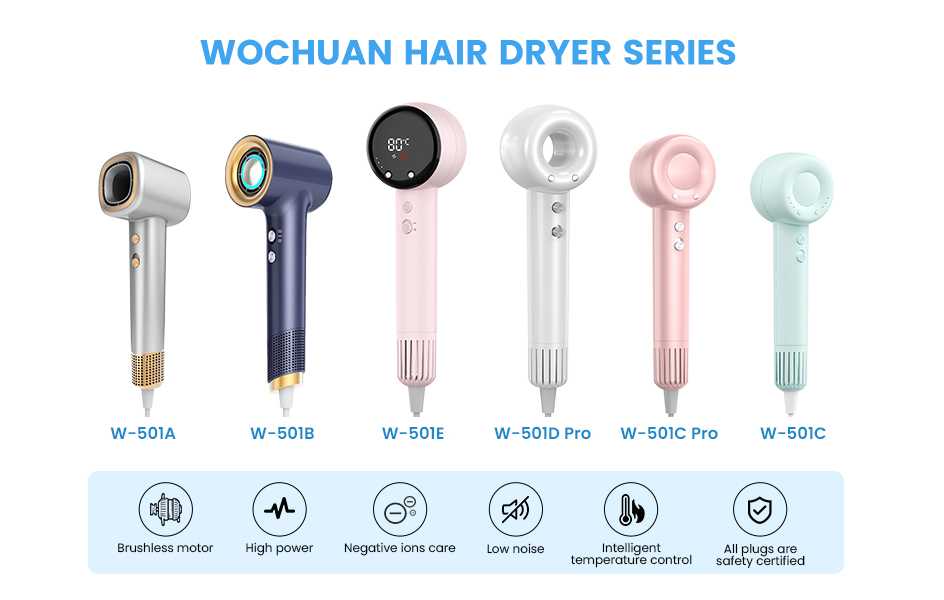
Sie möchten Ihre Haarroutine aktualisieren? Entdecken Sie unseren professionellen Haartrockner mit Diffusor-Wochuan-Haartrockner W-501-Serie . Wenn Sie Geschäftsmöglichkeiten in der Haarpflegeindustrie erkunden möchten, Wochuan ist Ihr vertrauenswürdiger Partner für eine zuverlässige und innovative Zusammenarbeit.